Traditional Meets Temptation: This Chocolate Baklava Recipe Is Next-Level
When I first tasted baklava during a summer trip to a small Greek village, I was floored by the symphony of flaky filo, sweet honey, and crunchy nuts. It was love at first bite. But being a lifelong chocoholic, I couldn’t help but imagine: what if we added chocolate to this already perfect dessert? After years of testing and tweaking, I finally perfected a version that marries the old-world charm of traditional baklava with the luscious indulgence of chocolate.
This post is not just a recipe — it’s a celebration of tradition, creativity, and a little bit of chocolatey rebellion. Whether you're a seasoned home baker or just dipping your toes into filo pastry for the first time, this easy chocolate baklava recipe is going to make you the dessert queen of your friend group.
This post may contain affiliate links at no extra cost to you. Please read our full disclosure here to find out more.

What Is Baklava, Really? A Sweet Slice of History
Baklava (or bachlavah depending on where you’re from) is a beloved pastry rooted in Greek, Turkish, and Middle Eastern cuisine. The traditional version is made with layers of paper-thin filo (or phyllo) dough, brushed with butter, filled with chopped nuts, and soaked in a fragrant honey syrup. It's a dessert that has stood the test of centuries — and for good reason.
This recipe stays loyal to the spirit of traditional Greek baklava, while adding a decadent layer of melted chocolate that makes every bite even more indulgent. Trust me, it’s a twist that works — and works beautifully.
Why Chocolate Belongs in Your Baklava
You might be wondering — is it really okay to mess with a classic? Let me just say: once you’ve tried chocolate baklava, there’s no going back. The dark, rich chocolate adds a velvety texture and bittersweet flavor that plays off the sweetness of the honey syrup and the crunch of the nuts.
It’s the kind of next-level dessert that makes you close your eyes with the first bite.
Whether you're hosting a dinner party, making something special for the holidays, or just want to elevate your dessert game, this chocolate baklava is a showstopper.
Ingredients (Exact Measurements)
Here’s what you’ll need to make this irresistible chocolate baklava recipe:
For the Baklava:
For the Syrup:
Step-by-Step: How to Make Chocolate Baklava
1. Prep Your Ingredients
Start by thawing your filo dough according to package instructions — usually overnight in the fridge. Don’t skip this step. Cold dough cracks, and cracked dough leads to tears (literally and emotionally).
Chop your nuts finely, either by hand or in a food processor. Mix them in a bowl with the sugar, cinnamon, cloves, and salt.
2. Layer Like a Pro
Preheat your oven to 350°F (175°C).
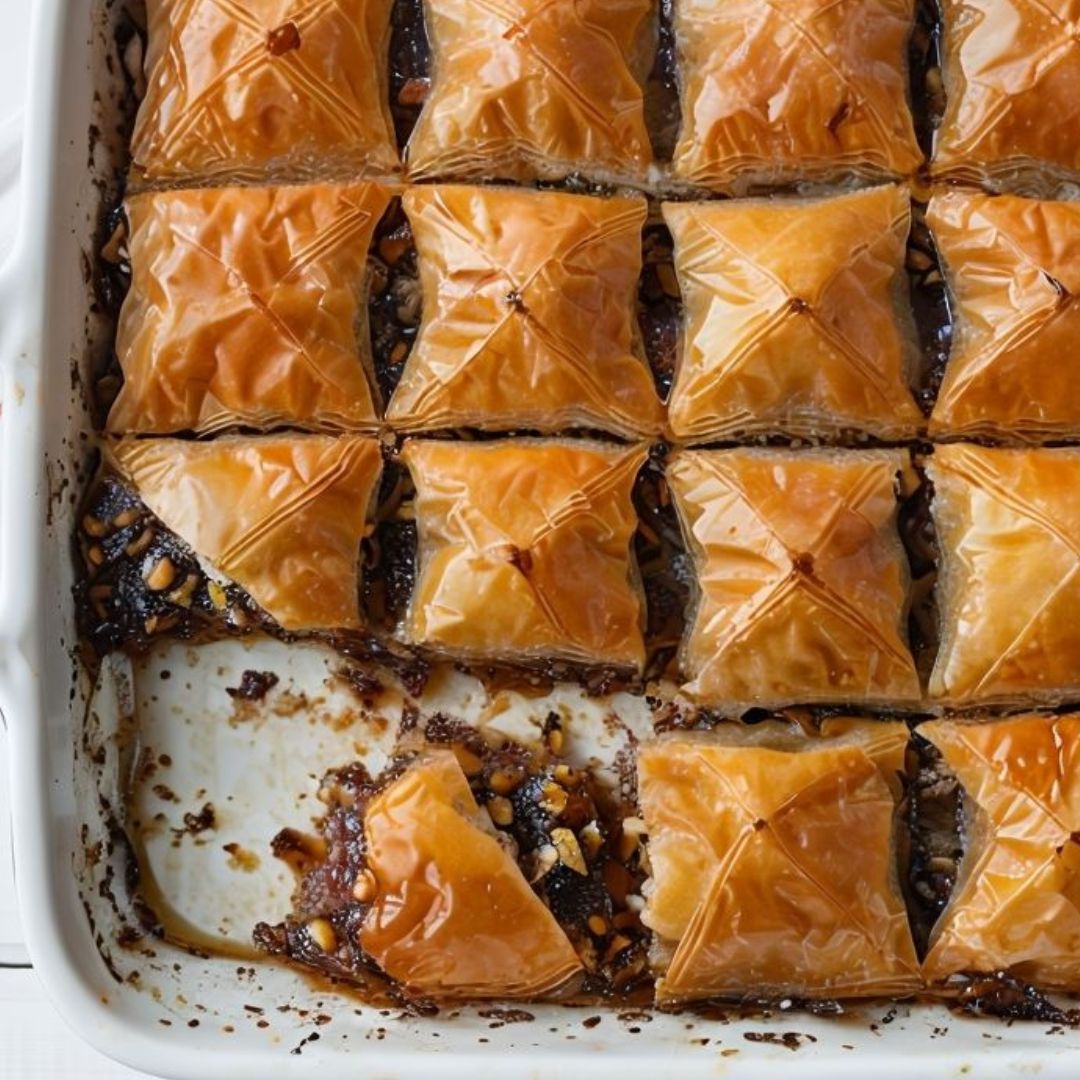
Brush a 9x13-inch baking dish with melted butter. Place one sheet of filo dough in the dish, and gently brush it with more butter. Repeat this process with 7 more sheets — you’ll have 8 buttery layers.
Now sprinkle about 1/3 of the nut mixture on top. Add a handful of dark chocolate chips.
Repeat this process two more times:
Finish with a final 8 layers of buttered filo on top.
3. Cut Before Baking
Using a sharp knife, cut the baklava into diamond or square shapes. This is easier to do before baking. Be gentle, and don’t worry if your lines aren’t perfect — this is homemade after all.
4. Bake
Bake in the preheated oven for 45–50 minutes, until golden and crisp.
Make the Syrup While It Bakes
While your baklava bakes, combine the water, sugar, honey, lemon juice, cinnamon stick, and vanilla extract in a saucepan. Bring it to a boil, then reduce heat and simmer for 10–12 minutes. Remove from heat and let cool slightly.
Once the baklava is done, pour the warm syrup evenly over the hot pastry. It will sizzle — and that’s the sound of flavor soaking in.
Let it cool completely before serving. This allows the syrup to seep into every delicious layer.
Amazon Must-Haves for Perfect Chocolate Baklava

Whether you’re brushing butter between filo sheets or applying egg wash to other pastries, a reliable pastry brush is essential.
Why I love it: Silicone bristles don’t shed and are heat-resistant. It’s easy to clean and gentle on delicate dough.
Perfect for filo, pies, and more — under $10!
2. Ozeri Digital Kitchen Scale

Precision matters in baking. This sleek digital scale ensures you’re using the exact amount of nuts, sugar, or butter for consistent results.
Why it’s great: Ultra-accurate, compact, and stylish enough to leave on the counter.
Essential for every home baker who wants to level up.
3. USA Pan Nonstick 9x13 Baking Pan

This pan delivers even heat distribution and a nonstick surface that makes cleanup a breeze.
What makes it awesome: Commercial-grade aluminized steel, made in the USA, and perfect for baklava, brownies, and lasagna.
This pan is a game-changer. No more sticking, no more soggy bottoms!
Serving Suggestions & Storage Tips
Serve your chocolate baklava at room temperature with a strong cup of Greek coffee or espresso. It also pairs beautifully with a scoop of vanilla ice cream or a dollop of Greek yogurt for contrast.
Storage:
Healthy-ish Tweaks (That Still Taste Amazing)
I get it — sometimes you want indulgence without the guilt. Here’s how to make your chocolate baklava a little more mindful:
These tweaks don’t take away from the flavor — they just help you feel better about going back for seconds. (Or thirds. No judgment here.)
Common Questions About Chocolate Baklava
Can I make this ahead of time?
Absolutely! In fact, it tastes better the next day as the flavors meld together.
Is it still considered “traditional” with chocolate?
It’s a modern twist, but it honors the same structure, technique, and spirit. Let’s call it tradition-inspired temptation.
Can I use puff pastry instead of filo?
Nope. Filo is key. Puff pastry is too thick and rich — you’ll end up with something more like a chocolate strudel.
What if I can’t find phyllo dough?
Most major grocery stores carry it in the freezer section. Look near the pie crusts and puff pastry. If you’re really stuck, check a Mediterranean or international market.
Final Thoughts: Why This Recipe Is Worth Every Layer
As someone who spends most days testing recipes, tweaking flavors, and writing about food, I can honestly say that this recipe brought me so much joy to create. It’s rooted in the traditional baklava I grew up loving, but the chocolate twist makes it feel fresh, fun, and totally crave-worthy.
So whether you're baking for your family, sharing with friends, or treating yourself to a moment of indulgence, this chocolate baklava recipe hits every note: crispy, gooey, nutty, and rich.
It’s the best dessert I’ve made all year — and I don’t say that lightly.
So go on, give it a try. You might just start a new tradition of your own.
Comments
Post a Comment